
How Hard Is It To Change Or Replace A U-Joint?
U-joints are built to last the lifetime of the vehicle, but that doesn’t always happen. Sometimes they can fail. They can also be damaged and weakened and need replacement. When they do, there is some work involved to replace them.
If you’re dealing with a malfunctioning or failed U-Joint, you may be wondering how easy it would be to replace it. Replacing a U-Joint has a similar level of difficulty as replacing a water pump or alternator. It helps to have the right tools and a comprehensive tutorial to follow. It is recommended that you take the vehicle to professional mechanic for U-Joint replacement. Improper installation of a universal joint can cause premature failure and even catastrophic damage to the vehicle.
Depending on your vehicle, you may be able to replace your U-Joint without removing anything else on the drivetrain. Yet, it’s still an involved process because it takes many steps and tools.
The Difficulty Level Of Replacing A U-Joint
Replacing a U-Joint is not a difficult job. But it does take patience, care, and attention to detail. That’s especially the case when working on vehicles with components that must be removed for full access to the driveshaft. That would make this job more difficult than changing the water pump or alternator, for example. Yet, it’d be less difficult than rebuilding or replacing your engine.
The Tools You Would Need To Replace A U-Joint

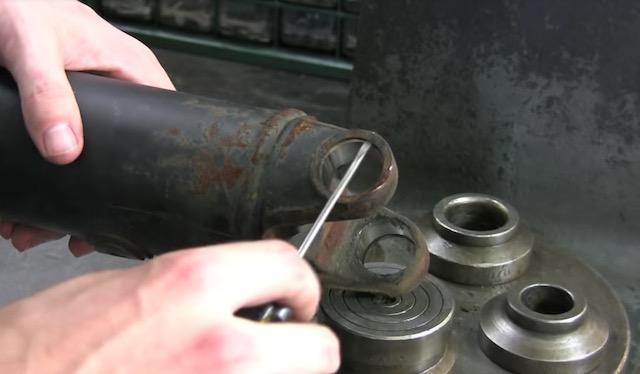
The specific set of tools you would need depends on your vehicle’s make and model. There’s still a general set of tools everyone would need to replace a u-joint, regardless of which vehicle they’re working on:
- Floor jack with jack stands to raise your vehicle
- Breaker bar or impact wrench
- Socket set and extensions (Sockets won’t work on some vehicles, so you may need wrenches.)
- U-Joint puller or C-Clamp
- Tape measure or ruler
- Sharpie marker (to mark the driveshaft before removing it)
- Torque wrench
If you don’t already have this set of tools, you can either buy them together in a kit or gradually piece it together. It’s generally worth the time and money to get these tools because you’ll use them again on future repairs.
What if you can’t replace your U-Joint without removing something else first? It will involve extra steps and more tools that are not listed above.
U-Joint Replacement Tips
To make the U-Joint replacement job as easy as possible, there are some good practices to follow. We put together some useful U-Joint replacement tips for you:
- Always use the right tools for the job.
- Mark the driveshaft and U-Joints so you know how everything goes back together and where to torque the bolts.
Take your time and pay attention to detail. When removing any parts from your vehicle, note how they were oriented before removal. Next, reinstall them exactly as they were removed or similarly oriented (if possible). Doing these things helps prevent unnecessary extra work. It also ensures a smooth reassembly process.
- As with any auto repair project, safety is important. Make sure to raise your vehicle with a proper floor jack and secure it with jack stands before getting under it. You’ll also want to wear protective gloves. Never work under a car supported only by a jack!
- Tape or rubber-band together the two opposing caps on the new joint. It’s so they can’t fall off during installation.
- Always replace your U-Joints in pairs. This article explains why.
MORE CONTENT
Stay current!
Sign up here to get the latest news
and updates on all things GMB.
Sign Up To Receive GMB News & Updates!
