
New Timing Belt Already Squeaking? Here’s What You Should Check
Did you just install a new timing belt, and it’s already making a squeaking noise? Since a timing belt has teeth, it can’t slip, therefore it’s not exactly a timing belt noise. Something else is the problem. This troubleshooting guide will help you pinpoint the cause of the noise.
Ruling Out The Timing Belt Tensioner And The Idler Pulleys
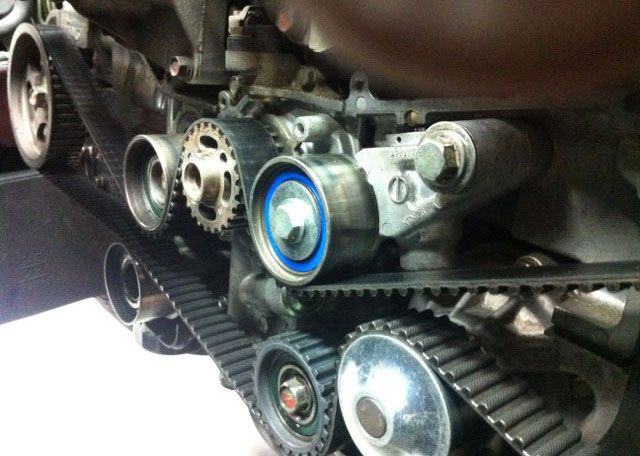
Sometimes the noise isn’t because of the timing belt, but rather the timing belt tensioner or the idler pulleys.
- The tensioner could be wiggling on a dry pivot point.
- You may have a worn or seized idler pulley.
Any of these scenarios may cause a squeaking noise. To check the tensioner and the idler pulleys, take the following steps:
- Remove everything in front of the engine’s front cover.
- Remove the front cover.
- Check the looseness of the timing belt on the opposite side of the tensioner. There should be a little bit of slack. If it’s too loose, the tensioner may be bad, and you need to replace it.
- Check for free movement of all the idler pulleys. If an idler pulley is either stuck or having trouble moving freely, then you’ve found the problem. In this case, the pulley needs replacing.
If both the timing belt tensioner and the idler pulleys seem OK, the problem is likely the timing belt. In that case, you want to check for the following:
1. Dirt/Oil/Debris Contamination
Sometimes when the timing belt is contaminated oil and dirt, it causes a squeaking noise.
To find out if this is the issue, grab a flashlight and then give the timing belt a visual inspection. Make sure it doesn’t have any oil on it. If you find that the timing belt is dirty:
- Find out what’s causing the timing belt to be contaminated and then fix the issue, if possible. If there is oil on the belt, and engine seal may have failed.
- Clean the timing belt and then reinstall it.
2. Incorrect Installation
Sometimes you can attribute the squeaking noise to human error. There’s a chance the timing belt wasn’t installed the right way. There are three possible scenarios:
- The timing belt isn’t following the correct path.
- The tensioner may have been set too loose or too tight.
- The belt got frayed during the installation process. This is rare, but it still happens.
To confirm whether the timing belt is installed correctly:
- Verify the correct timing belt path in the service manual. Reposition it if needed.
- Check the tension of the timing belt. It should have about 3/4″ of play. Adjust the tensioner if needed.
- With a flashlight, look at the timing belt and see if it’s frayed anywhere. Replace the belt if needed.
3. Wrong Timing Belt Size
The timing belt could be either too wide, narrow, thick or thin. The best way to figure out whether your timing belt is the right size is to look up the part number. The timing belt should be made for your engine.
If you find that the timing belt is the wrong size, the only thing you can do is to replace it with one that’s the correct size.
Do You Need To Replace Your Timing Belt?

At GMB, we offer OE quality timing belt/water pump kits. It’s a good idea to replace the timing belt and water pump together for the reasons listed here. If you’re looking for tips on replacing both parts, we have 4 useful tips.
MORE CONTENT
Stay current!
Sign up here to get the latest news
and updates on all things GMB.
Sign Up To Receive GMB News & Updates!
